30 Aug 2013
Single table inheritance is a software pattern described by Martin Fowler. STI is basically an idea of using a single table(colection in case of mongo) to reflect multiple models that inherit from a base model.
We use STI pattern when we are dealing with classes that have same attributes and behaviour. Rather than duplicate the same code over and over, STI helps us to use a common base model and write specific behaviours in its inherited class while keeeping data on a same table.
Mongoid supports inheritance in both root and embedded documents. In
scenarios where documents are inherited from their fields, relations, validations and scopes get copied down into their child documents, but not vice-versa.
A very simple example:
  class Employee
    include Mongoid::Document
    field :name, type: String
    field :employee_code, type: Integer
  end

  class FullTimeEmployee < Employee
    field status, type: String, default: "Temporary"
  end

  class InternEmployee < Employee
    field intern_period, type: Integer
  end
23 Aug 2013
This is a quick tip you can use for getting the selected text from your webpage.
  <p>I am not selectable. You can test.</p>
  <div id="here">
      How about selecting me. Try me.
  </div>
  $(document).ready(function() {

    function getSelectedText(){
        var text = "";
        if (window.getSelection) {
            text = window.getSelection();
        } else if (document.getSelection) {
            text = document.getSelection();
        } else if (document.selection) {
            text = document.selection.createRange().text;
        }
        return text;
    }

    $('#here').bind("mouseup", function(){
        alert(getSelectedText());
    });

  });
18 Aug 2013
Knockout.js is known for rapid and responsive UI development. Lets try it to build something today.
Lets see quick demo of what we are going to build.
Download Source
This is a basic table that is used in bills or receipts. We will try to add some magic to table like autocomplete, automatic information fill up of selected item and calculation of amounts with the help of knockout.
I will not describe what knockout.js is and why use it.
Learn.knockout.js has an excellent
tutorial for knockout js beginners. I strongly suggest to go through
learn.knockoutjs.com before proceeding.
I assume basic understanding of knockout js from here.
Let’s setup the files first. Nothing fancy, I have just used jquery source file and knockout source js from their official websites and I have used twitter bootstrap prettifying stuffs.
I have initial table markup, which looks like as shown below:
  <div class="container">
    <div class="row">
      <div class="span12">
        <table class="table table-bordered">
          <thead>
            <tr>
              <th>Item</th>
              <th>Description</th>
              <th>Unit Price</th>
              <th>Quantity</th>
              <th>Amount</th>
              <th>Actions</th>
            </tr>
          </thead>
          <tbody>
            <tr>
              <td><input class="span3"  /></td>
              <td><input class="span4" /></td>
              <td><input class="span1" /></td>
              <td><input class="span1" /></td>
              <td><input class="span1" /></td>
              <td><button class="btn">Remove</button></td>
            </tr>
          </tbody>
        </table>
        <p class="pull-left">
          <button class="btn">Add New Row</button>
          <button class="btn">Save</button>
        </p>
        <h4 class="pull-right">
          <strong>Grand Total: <span></span> </strong>
        </h4>
      </div>
    </div>
  </div>
Lets see what we have upto here and talk something about what we are trying to do to this table.
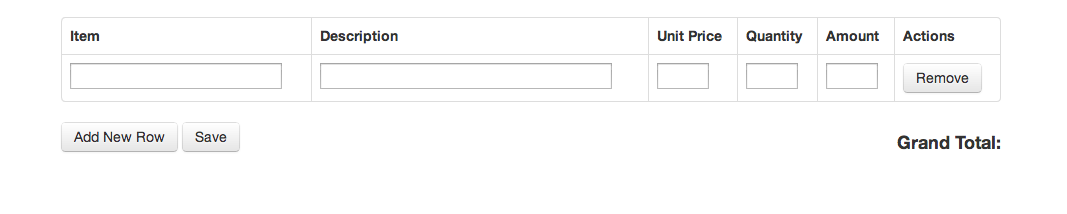
Lets summarize the behaviours we would like to have:
- Add a new row
- Suggest items in item field
- Fill up the item information (description and price) automatically
- Calculate the grand total as items are added
- A remove button to remove item and re-compute grand total automatically on removal
Read More...
19 Jul 2013
With the introduction of Canvas, HTML5 has empower us to draw shapes, graphs, render texts, make gradients and patterns, manipulate images pixels, set an animations, even creating a stunning games!
All this stuffs occur on the client side in the browsers.
So let say you make an app that render some effects in a Canvas element and you want to allow user to take screenshot of the resut or save the result in your server for yourself.
Let’s digg how can we do it and save that canvas as an image in ther server using Rails.
Strategy 1 : Send canvas image as raw dataURL
The data URI scheme is a URI scheme that provides a way to include data in-line in web pages as if they were external resources. The canvas.toDataURL() method returns the image data of the canvas as Data URI. And the Data URI has the image data Encodes with MIME base64.
Let’s see how it works. Copy and run this javascript snippet in your browser console. Somewhere at the bottom of the page you’ll see a green circle.
  var canvas = document.createElement('canvas');
  var context = canvas.getContext('2d');
  var centerX = canvas.width / 2;
  var centerY = canvas.height / 2;
  var radius = 70;

  context.beginPath();
  context.arc(centerX, centerY, radius, 0, 2 * Math.PI, false);
  context.fillStyle = 'green';
  context.fill();
  context.lineWidth = 5;
  context.strokeStyle = '#003300';
  context.stroke();

  document.body.appendChild(canvas);
Now lets render that canvas as an image.
  var dataURL =  canvas.toDataURL('image/png');
  window.location = dataURL;
As you can see, with that weird long url string something like data:image/png;base64,iVBORw0KGgoA..., it render a png image. That long url is infact data uri which has image data encoded with MIME base64.
The format to be specific is ** data:[<mime type>][;charset=<charset>][;base64],< encoded data > **.
Now, if we want to save that image in the server, we can just send that data uri as normal params and at the server, we can use ruby to decode that save that data as image file.
  require 'base64'

  data = params[:data_uri]
  # remove all extras except data
  image_data = Base64.decode64(data['data:image/png;base64,'.length .. -1])

  File.open("#{Rails.root}/public/uploads/somefilename.png", 'wb') do |f|
    f.write image_data
  end
Strategy 2 : Send It as a Blob object
This method also use the dataURL but instead of send it as a raw text, we convert it to an image file object and send it.
For this we use the Blob object. Simply it’s an object that represent a file-like object, so we create a blob object with the type PNG image, after we append this blob object to a FormData, and finally we send it through the jQuery Ajax Method.
Let’s detail a bit what I say above, we already see how we get the dataURL from an object, the dataURL is only a raw text, so we need to decode it to a binary data, we already know that the type of the encoding in the dataURL is Base64, and for decode it using a JavaScript solution we use the predefined atob method, now after decoding it we get a binary data, and we need to convert it to an array where there element is a 8-bit unsigned integer values. Finally we have to put this array in a new Uint8Array object for pass it to our Blob object that represent our file, now let create a function that do this and convert our Canvas to a blob object:
  // Convert dataURL to Blob object
  function dataURLtoBlob(dataURL) {
    // Decode the dataURL
    var binary = atob(dataURL.split(',')[1]);
    // Create 8-bit unsigned array
    var array = [];
    for(var i = 0; i < binary.length; i++) {
        array.push(binary.charCodeAt(i));
    }
    // Return our Blob object
    return new Blob([new Uint8Array(array)], {type: 'image/png'});
  }
We can now create a new FormData object, put our file on it and send our data using Ajax.
  // Get our file
  var file= dataURLtoBlob(dataURL);
  // Create new form data
  var fd = new FormData();
  // Append our Canvas image file to the form data
  fd.append("image", file);
  // And send it
  $.ajax({
     url: "/screenshot",
     type: "POST",
     data: fd,
     processData: false,
     contentType: false,
  });
At controller:
  File.open("#{Rails.root}/public/uploads/somefilename.png", 'wb') do |f|
    f.write(params[:image].read)
  end
So, that’s it.
This method is more appropriate and faster than the first one.
Those wondering how to mix this with carrierwave and paperclip, here are the links:
Rails carrierwave base-64 encoded image upload
Base64-encoded images with Paperclip
Read More...
02 Jul 2013
We define methods using def keywords which is fine for most of the cases.
But consider a situation where you have to create a series of methods all of which have the same basic structure and logic then it seems repititive and not dry.
Ruby, being a dynamic language, you can create methods on the fly.
So, what does that mean?
lets see this simplest example:
  class A
    define_method :a do
      puts "hello"
    end

    define_method :greeting do |message|
      puts message
    end
  end

  A.new.a #=> hello
  A.new.greeting 'Ram ram' #=> Ram ram
The define_method defines an instance method in the receiver. The syntax and usage are self-explained in the example above.
lets see following example that may be useful in practical scenarios.
  class User

    ACTIVE = 0
    INACTIVE = 1
    PENDING = 2

    attr_accessor :status

    def active?
      status == ACTIVE
    end

    def inactive?
      status == User::INACTIVE
    end

    def pending?
      status == User::PENDING
    end

  end

  user = User.new
  user.status = 1

  user.inactive?
  #=> true
  user.active?
  #=> false
Refactored code using dynamic method definition:
  class User

    ACTIVE = 0
    INACTIVE = 1
    PENDING = 2

    attr_accessor :status

    [:active, :inactive, :pending].each do |method|
      define_method "#{method}?" do
        status == User.const_get(method.upcase)
      end
    end

  end

  user = User.new
  user.status = 1

  user.inactive?
  #=> true
  user.active?
  #=> false
We use define_method to define method dynamically.
We can also define instance methods with a class method, using this technique we can expose a class method that will generate the instance methods. COOL !
Example:
  class User

    ACTIVE = 0
    INACTIVE = 1
    PENDING = 2

    attr_accessor :status

    def self.states(*args)
      args.each do |arg|
        define_method "#{arg}?" do
          self.status == User.const_get(arg.upcase)
        end
      end
    end

    states :active, :inactive, :pending
  end
Now, what about class methods. The simplest way is
    class A
      class << self
        define_method method_name do
          #...
        end
      end
    end
There are instance_eval and class_eval also, which are used for dynamic method definition. These methods allow you to evaluate arbitrary code in the context of a particular class or object. These methods can be very confusing sometimes. You can read this discussion and this blog post and understand how they can be used.
From that discussion, we summerize
  Foo = Class.new
  Foo.class_eval do
    def class_bar
      "class_bar"
    end
  end
  Foo.instance_eval do
    def instance_bar
      "instance_bar"
    end
  end
  Foo.class_bar       #=> undefined method ‘class_bar’ for Foo:Class
  Foo.new.class_bar   #=> "class_bar"
  Foo.instance_bar       #=> "instance_bar"
  Foo.new.instance_bar   #=> undefined method ‘instance_bar’ for #<Foo:0x7dce8>
Note that, we don’t use define_method inside *_eval, becasue it does not matter if you use define_method inside class_eval or instance_eval it would always create an instance method.
And, we get this:
  Foo = Class.new

  Foo.class_eval do
    define_method "class_bar" do
      "class_bar"
    end
  end

  Foo.instance_eval do
    define_method "instance_bar" do
      "instance_bar"
    end
  end

  Foo.class_bar #=> undefined
  Foo.new.class_bar #=> "class_bar"
  Foo.instance_bar #=> undefined
  Foo.new.instance_bar #=> "instance_bar"
Next, we can invoke methods dynamically. One way to invoke a method dynamically in ruby is to send a message to the object. We can send a message to a class either within the class definition itself, or by simply sending it to the class object like you’d send any other message. This can be accomplished by usin send.
The simplest example could be:
  s= "hi man"

  p s.length #=> 6
  p s.include? "hi" #=> true

  p s.send(:length) #=> 6
  p s.send(:include?,"hi") #=> true
How can this be ever useful?
Lets see the following code( example taken from here)
  class ApplicationController < ActionController::Base
    protect_from_forgery
    helper_method :current_staff, :current_employee, current_admin

    def authenticate_staff!(opts={})
      current_staff || not_authorized
    end

    def current_staff
      current_user if current_user.is_a? Staff
    end

    def authenticate_employee!(opts={})
      current_employee || not_authorized
    end

    def current_employee
      current_user if current_user.is_a? Employee
    end

    def authenticate_admin!(opts={})
      current_admin || not_authorized
    end

    def current_admin
      current_user if current_user.is_a? Admin
    end
  end
And refactored one:
  %w(Staff Employee Admin).each do |k|
    define_method "current_#{k.underscore}" do
      current_user if current_user.is_a?(k.constantize)
    end

    define_method "authenticate_#{k.underscore}!" do |opts={}|
      send("current_#{k.underscore}") || not_authorized
    end
  end
Dynamically defined methods can help guard against method definition mistakes, avoid repetitive codes and be concise and smart.
Happy Metaprogramming.
Read More...